
How To Put Chains On Tires

Tire chains can be your best friend when the weather turns nasty and snow and ice cover the roads. These devices provide much-needed traction, helping you navigate slippery surfaces and maintain vehicle control in challenging conditions.
But with so many chains available, how do you choose the right one? And once you’ve made your selection, how do you properly install and use them? We will explore selecting the right tire chains, preparing your vehicle, and installing the chains.
Choosing the Right Chains
Several types of tire chains are available, each with advantages and disadvantages. Some standard options include:
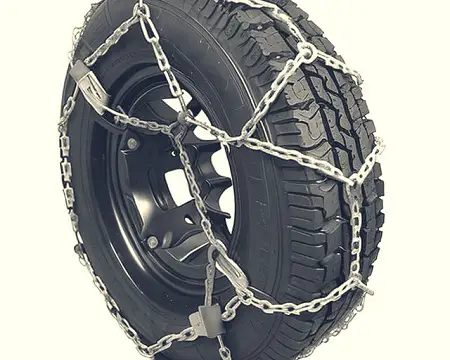
- Ladder-style chains: These are the most traditional and recognizable type of tire chains. They feature a ladder-like pattern that lays across the tire’s tread, providing good traction on ice and snow.
- Diamond-pattern chains: These chains offer a more even distribution of weight and provide better traction on icy surfaces. They are also easier to install and remove.
- Cable chains: Made of steel cable, these chains are lightweight and easy to install but may provide less traction than other options.
- Automatic tire chains: As the name suggests, these chains automatically engage when needed, making them an ideal choice for drivers with varying road conditions.
To choose the right size and type of chain for your tires, consult your vehicle’s owner’s manual and tire specifications. Consider your driving habits, typical road conditions, and local laws or restrictions.
Preparation
Before you install your tire chains, it’s essential to check the compatibility between your tires and the chains. First, verify that the tire chains are designed to fit your tire size. This information is usually listed on the chain packaging or manufacturer’s website.
Also, confirm that your vehicle’s clearance can accommodate the added bulk of the chains. Some vehicles, particularly those with low-profile tires or limited wheel well clearance, may not be suitable for certain types of chains.
Installation Steps
Once you’ve selected the right chains for your vehicle, follow these steps to install them:
- Lay out the chains: Spread the chains on the ground, ensuring there are no tangles or twists in the links. The connectors should be positioned on the outside of the tire, and any tensioning devices should face away from the tire.
- Drape the chains over the tire: Place them on top of the tire, ensuring they are evenly distributed across the tread. For ladder-style chains, ensure that the cross chains align with the center of the tire’s tread.
- Secure the chains: Connect the inner and outer links or hooks, following the manufacturer’s instructions. This process may vary depending on the type of chain you have.
- Adjust the tension: Once the chains are secured, tighten them using the tensioning devices provided. This may involve pulling a chain tightener, adjusting a cam tensioner, or using a rubber adjuster. The chains should fit snugly against the tire without any slack.
- Test the chains: After installation, drive forward a few feet and stop to check the chains. Ensure they are still secure and properly tensioned. Make any necessary adjustments before continuing.
Tips for Safe Driving with Chains
When driving with tire chains, follow these safety practices:
- Observe speed limits: Tire chains are designed for low-speed driving. Most manufacturers recommend a maximum speed of 30 mph (50 km/h) when using chains. Exceeding this limit can cause the chains to break or damage your vehicle.
- Avoid sudden maneuvers: Sudden turns, sharp braking, and abrupt acceleration can cause the chains to become loose or break. Drive cautiously and make smooth, controlled movements when using tire chains.
- Use chains on all drive wheels: If your vehicle is a front-wheel drive, install chains on both front tires. For rear-wheel drive vehicles, install chains on both rear tires. For all-wheel drive or four-wheel drive vehicles, consult your owner’s manual for guidance on which tires to fit with chains.
- Routinely check chain condition: Periodically stop and check the condition of the chains during your journey. Ensure they are secure, properly tensioned, and free of damage. If you find any broken or damaged links, remove the chains and replace them.
- Remove chains when not needed: Tire chains should only be used on snow or ice-covered roads. Driving on dry or clear surfaces with chains can cause unnecessary wear and damage to both the chains and your tires. Remove the chains as soon as road conditions improve.
- Practice before you need them: Familiarize yourself with the installation process before encountering challenging weather conditions. Practice installing and removing the chains in a safe and controlled environment, such as your driveway or a nearby parking lot.
Conclusion
Tire chains are an essential tool for navigating icy and snow-covered roads safely. Choosing suitable chains, properly installing them, and following safe driving practices can greatly improve your vehicle’s traction and stability in harsh winter conditions.
Consult your vehicle’s owner’s manual for tire chain compatibility and installation guidance. With the right knowledge and preparation, you’ll be well-equipped to handle whatever winter weather comes your way.

Asma Akter is a renowned tire expert, celebrated for her extensive knowledge and innovative approaches in tire technology and performance. Her expertise has significantly contributed to advancements in vehicle safety and efficiency.